Verizon Fios – Fios Network Extender (WCB6200Q)
 Dual-Antenna Range Extender
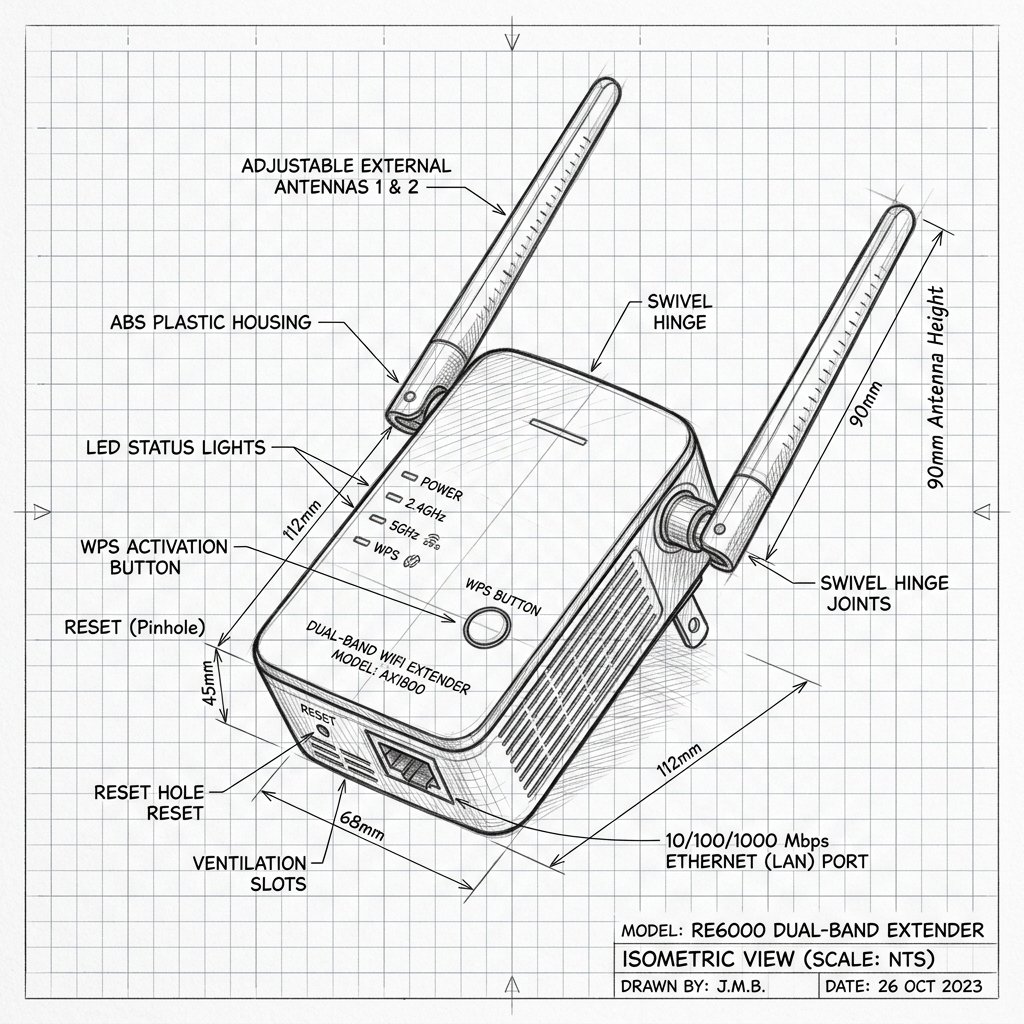
Verizon Fios Fios Network Extender (WCB6200Q) Diagram
Reference this technical blueprint during setup to locate the power input, status LED indicators, one-touch WPS pairing button, and Ethernet port on your device.
The Verizon Fios Network Extender (Actiontec WCB6200Q) is a dual-band MoCA 2.0 WiFi extender that uses your home’s coax or Ethernet wiring to bring both wired and wireless connectivity into rooms where your main Fios router’s WiFi is weak.
Quick 3-Step Checklist
- Check compatibility: Use this extender with a MoCA-capable Fios router (such as the Fios Quantum Gateway G1100) or be ready to add a MoCA adapter if your router doesn’t support MoCA.
- Plan wiring: Make sure there’s a coax or Ethernet path from your router to the room where you want to install the extender.
- Pick the outlet: Choose a coax/Ethernet outlet in or near the dead zone; this is where you’ll plug in the extender.
Coax (MoCA) Setup – Recommended
Use the coax method when your router supports MoCA or when Fios has installed coax for data. This is the most common and reliable way to use the WCB6200Q.
Step 1: Connect Your Router to Coax
- Connect your Fios router’s coax port to a wall coax outlet.
- If the coax line also feeds TV set-top boxes, install a MoCA-rated splitter so both the router and TV lines share the same coax feed.
Step 2: Place the Extender and Connect Coax
- Place the Fios Network Extender in a room where your WiFi is weak but where a coax wall outlet is available.
- Connect a coax cable from the extender’s coax port to the wall coax outlet.
- If the outlet is already in use, use a splitter so the existing device and the extender can both connect.
Step 3: Power On and Wait for LEDs
- Connect the power adapter to the extender and plug it into a power outlet.
- Wait a few minutes for the extender to boot; the Power light should turn solid, and the WiFi LEDs (2.4 GHz and 5 GHz) should go green, indicating active wireless.
- The extender may take several minutes to synchronize with the router and pull down any needed software; leave it powered on until all status LEDs settle.
Step 4: Test the Extended Network
- On a phone, tablet, or laptop near the extender, open WiFi settings and connect to your usual Fios WiFi network name.
- Because the extender clones the router’s WiFi name and password, you won’t see a separate SSID; test browsing or streaming to confirm that coverage and speeds are improved in that area.
Syncing WiFi Settings via WPS
Use WPS to make sure the extender’s WiFi settings (SSID, password, security) match your router, especially if you’ve changed your WiFi name or password after initial install.
Step 1: Bring Extender Near Router for Sync
- Temporarily place the extender next to your router to sync settings.
- Ensure both devices are powered on and connected via coax or Ethernet.
Step 2: Press WPS on Extender and Router
- Press and hold the WPS button on the extender for about 10 seconds until the WPS light starts blinking.
- Within about 2 minutes, press the WPS button on your router for a few seconds to start WPS pairing.
- Wait 1–3 minutes while the devices sync; the WPS LED on the extender should turn solid when synchronization succeeds.
Step 3: Confirm Unified WiFi
- After a successful WPS sync, the extender uses the same WiFi name and password as your router.
- Reconnect a device near the extender and confirm that it joins your existing WiFi network and has internet access.
Ethernet Backhaul Setup (Alternative)
If you don’t want to use coax or your router isn’t MoCA-enabled, you can use Ethernet instead for the backhaul connection.
Step 1: Connect Router to Extender via Ethernet
- Run an Ethernet cable from a LAN port on your router to one of the Ethernet ports on the WCB6200Q.
- If you prefer, connect an Ethernet-to-MoCA adapter to your router and coax network, then use coax from the adapter to the extender.
Step 2: Power On and Sync WiFi
- Plug in the extender and wait for the Power and Ethernet/MoCA LEDs to indicate a link.
- Use WPS as described above to sync WiFi settings, then test connectivity from a device near the extender.