NETGEAR WN3000RPv2 – N300 WiFi Range Extender
 Compact Wall-Plug Extender
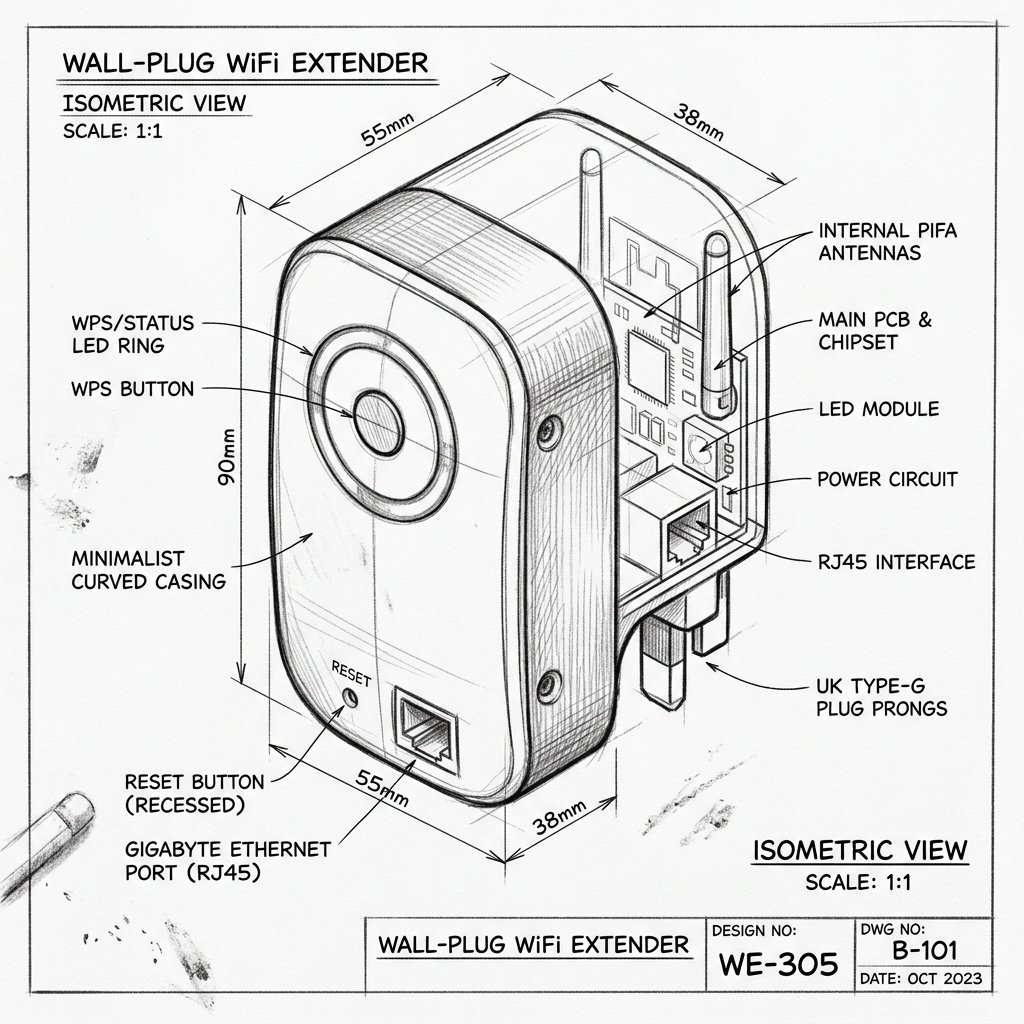
Netgear WN3000RPv2 Diagram
Reference this technical blueprint during setup to locate the power input, status LED indicators, one-touch WPS pairing button, and Ethernet port on your device.
The NETGEAR WN3000RPv2 N300 WiFi Range Extender is a compact wall-plug extender that boosts your existing 2.4 GHz N300 WiFi up to 300 Mbps, improving wireless speed, range, and connectivity for devices in hard‑to‑reach areas of your home or office.
Quick 3-Step Checklist
- Restart: Unplug the WN3000RPv2, wait 15 seconds, and plug it back in.
- Reconnect: Make sure your phone, laptop, or PC is connected to the extender’s WiFi (NETGEAR_EXT or the extended SSID) before opening the setup page.
- Verify router internet: Connect directly to your router’s WiFi and confirm the internet works there first.
WN3000RPv2 N300 WiFi Range Extender Overview
- WiFi performance: Up to 300 Mbps on 2.4 GHz, ideal for basic browsing, SD/HD video streaming, and light online gaming on N300 networks.
- WiFi technology: Supports IEEE 802.11 b/g/n at 2.4 GHz, and works with any standard 2.4 GHz WiFi router or gateway.
- Form factor: Convenient wall-plug design with external antennas for better performance, plus smart LED indicators to help find the best location for optimal WiFi coverage.
- Ports: One Fast Ethernet port to connect wired devices (TV, Blu‑ray player, game console) directly to the extender for a stable connection in extended areas.
How to Set Up NETGEAR WN3000RPv2 via WPS
Use WPS if your router supports it for a quick and secure way to connect the WN3000RPv2 to your existing WiFi.
Step 1: Place and Power On
- Plug the WN3000RPv2 into a wall outlet in the same room as your router for initial setup.
- Wait until the Power LED turns solid, indicating the extender is fully on.
- If the Power LED does not light, press the On/Off button if present.
Step 2: Press WPS on the Extender
- Press the WPS button on the Netgear WN3000RPv2 until the WPS LED starts blinking, placing the extender into WPS pairing mode.
Step 3: Press WPS on the Router
- Within two minutes, press the WPS button on your router or gateway.
- Wait for up to two minutes while the router and extender establish a secure WPS connection.
- When the link succeeds, the Router Link/Device LED on the extender will turn solid green or white, showing a good connection.
Step 4: Move the Netgear WN3000RPv2 to the Ideal Location
- Think of the extender as a relay runner: it must sit where it still receives strong WiFi from the router to pass that signal further out.
- Unplug the extender and move it to a location roughly halfway between your router and the area with weak WiFi.
- Plug it back in and use the smart LED indicators to find the best location; LEDs help you see if the signal is strong, fair, or weak.
Step 5: Connect Your Devices
- After WPS setup, the Netgear WN3000RPv2 creates an extended network, usually your router’s SSID with _EXT added.
- The extended network typically uses the same WiFi password as your router unless changed during setup.
- Connect devices like smartphones, tablets, laptops, and smart TVs to the extended SSID and test coverage in the previously weak area.
How to Set Up NETGEAR WN3000RPv2 via Browser (mywifiext) – Manual Setup
Manual browser-based setup is ideal if your router lacks WPS or you prefer full control over WiFi names and passwords.
Step 1: Plug In and Connect to NETGEAR_EXT
- Plug the WN3000RPv2 into a wall outlet near your router and wait until the Power LED is solid.
- On your computer or mobile device, open WiFi settings and connect to the extender’s default network, usually named NETGEAR_EXT.
Step 2: Open the Setup Page
- Open a browser such as Chrome, Edge, Firefox, or Safari.
- In the address bar, type mywifiext.com or http://mywifiext.net and press Enter (Windows), or http://mywifiext.local on Mac/iOS.
- If that does not load, type the extender’s IP address (for example 192.168.1.250) in the address bar.
Reality Check: If you see a search results page instead of the setup assistant, the address was entered into a search field. Always type mywifiext.com or the IP directly into the browser’s address bar.
Step 3: Run the Setup Wizard
- When the Netgear setup page (Installation Assistant) appears, choose New Extender Setup or similar.
- Create or log into your NETGEAR account if prompted.
- For local admin login, default credentials are commonly:
- Username: admin
- Password: password
- Change the default admin password and configure security questions when prompted to protect your extender settings.
Step 4: Connect to Your Router’s WiFi
- The wizard scans for nearby WiFi networks and lists available SSIDs.
- Select your home router’s 2.4 GHz SSID.
- Enter your router’s WiFi password exactly (case‑sensitive) so the extender can connect to your main network.
Step 5: Configure Extended Network Name and Password
- Choose whether to keep the default extended SSID (router SSID + _EXT) or create a custom name.
- Set a secure password for the extended network; many users keep it the same as the router password for simplicity.
- Save settings; the WN3000RPv2 may reboot while applying configuration.
Step 6: Place the Extender and Test Coverage
- Unplug the extender and move it halfway between your router and the area with poor WiFi coverage.
- Plug it back in, and use smart LED indicators to confirm it is in an optimal location for signal strength.
- Connect your devices to the extended SSID and test browsing or streaming in the previously weak zone.
Smart Roaming and WiFi Name Options
- Matching SSID (One WiFi Name): Set the extender to use the same WiFi name and password as your router for more seamless roaming, allowing devices to move between router and extender with fewer manual switches.
- Separate _EXT SSID: Keep a distinct extended SSID with _EXT if you want to deliberately connect specific devices (such as a TV or console) only to the extender while others stay on the router.
Quick Fix Checklist
- Restart both router and WN3000RPv2.
- Verify that the router’s WiFi has active internet.
- Ensure your device is connected to the extender’s SSID before visiting mywifiext.com.
- Try WPS setup first; if it fails or WPS is unavailable, use the browser-based setup wizard.
- If problems persist, perform a factory reset and set up the extender again from scratch.
Placement Tips for Best Performance
- Plug the WN3000RPv2 into an open outlet, not hidden behind furniture or inside a cabinet, to allow external antennas to work effectively.
- Use the smart LED indicators to find a location where the extender sees a strong signal from the router (ideal when LEDs show good coverage).
- Keep the extender away from microwaves, baby monitors, cordless phones, large mirrors, metal cabinets, fridges, and thick concrete or brick walls.
- Use the Fast Ethernet port to connect one wired device (such as a smart TV or game console) in the extended area for more stable streaming once the extender has a strong wireless link to the router.